"Why do photographers charge so much for just working 8 hours at a wedding? Anyone with a camera can do their job. It's easy!"
Oh yeah?
Consider what some professional photographers offer...
1. He will be at the wedding for 8-12 hours of coverage at a typical wedding, rarely getting a chance to even sit down.
2. He has a couple of hours of consultation time before the wedding with the client and probably just as much time doing that after the wedding too when they give their input on their album design.
3. He'll shoot between 1000 to 1500 images on average at the wedding.
4. He'll use top of the line, professional grade camera gear and backup gear at the wedding which will cost nearly $20,000.
5. He has a professional office and doesn't meet you at Starbucks.
6. He will spend many hours (often 20 hours or more) in post production, working on the computer to enhance the look of each image using Photoshop.
7. He will spend many hours designing and re-designing your wedding album.
8. He will offer only the top-of-the-line wedding albums to make your album look good. That costs a lot more money than you might think... even at wholesale!
9. He will have insurance not only for his equipment, but to also cover you with errors and omissions insurance.
10. He will have to work professionally, dealing with all sorts of personalities at the wedding.
11. He will have experience to know what to shoot, when to shoot it, how to work without being obtrusive.
12. He will have the technical knowledge about photography to cover any situation that comes his way... dark churches without using a flash, being stuck in the back of the church the entire time and still get decent images, etc.
13. He will know when to take charge if required. Often times, without his input, nothing interesting happens at the wedding to take photos of. Sometimes shots need to be orchestrated and he'll know how to do that and when to do that.
14. He will know how to work with the other vendors to make your day run smoothly. This includes knowing how to work with the DJ or band, and how to work with the catering staff and the church staff as well.
15. He will have to advertise his business so that he will be able to stay in business.
16. He will continue to attend seminars and other training to keep up to date with current trends in the wedding industry.
17. He will need to network with other wedding professionals to offer you good advice and suggestions on how to make your wedding run smoothly.
Still think the job is easy? Can just anyone with a camera do it?
This is a small list of reasons why professional photographers charge what they do. There are plenty more reasons to hire a professional for your wedding rather than just anyone with a camera.
The world according to Russ... Be sure to visit my food blog at https://foodforruss.blogspot.com
Tuesday, June 30, 2009
Monday, June 29, 2009
"I Can't Afford An Album, So I Can't Book You..."
Somrtimes I meet potential clients who like my work, but they tell me they can't afford me. Or, they'll tell me they can't hire me because they can't afford the album. Should they move on to another photographer?
I don't think so.
If you find someone who you like personally, and you find someone whose style of photography you like, but you can't afford that photographer, find other ways to book him/her! Often photographers have lower priced packages that do not include an album. Do that! Why? Because you'll at least still get the quality of the photographer's vision and work. You can always get a wedding album later.
Often, after the wedding, you'll find yourself with a bunch of "gift money" and I've had clients in the past who come back to me right after the wedding was shot to order an album at that time. That's a smart way to get the right photographer booked in advance and then get the album you want afterwards.
And what if you still can't afford an album after the wedding? Don't worry about it. The key is to get quality images taken in the first place. Why book a photographer who offers you a lot of items including an album but is just a tough personality to deal with or if his/her photos are not up to par? You'll still end up with a bad time at your wedding and bad photos! Of course you would have saved some money, but was it worth it? Not to mention that bad photos in an album... still come out looking... bad!
To me, it's better to have nice photos with a nice person than to be stuck with a grouchy photographer for the day who gives mediocre photos. Don't you agree?
So if you are on the fence about which photographer to hire for your wedding or event, pick the one who you feel most comfortable with and who offers the best quality images possible. I'm sure you can find a happy medium to work together. You may find he/she is willing to work out something for you if you are the right client. All you need to do is ask to see what can be done.
Sunday, June 28, 2009
Fishing
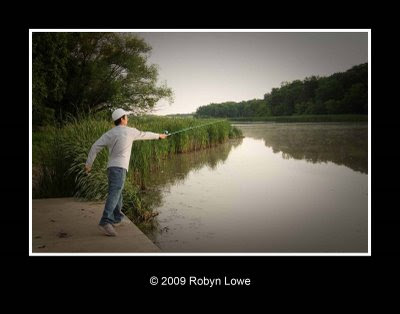
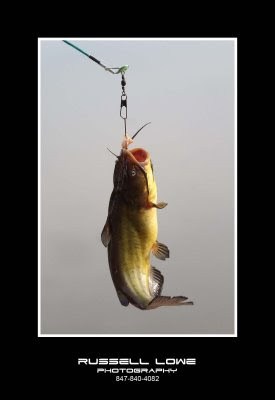
A group of us went fishing Saturday morning around 5:30 AM. Only two small bullhead catfish were caught. My daughter did the honors of taking most of the photos on this expedition while I was helping others get their lines and poles ready, but I jumped in for the closeup shot of one of the fish after it was caught. In case you are wondering, the extra piece hanging by the fish's mouth is part of the nightcrawler used as bait.
While we were out fishing, one of the fish and game officers came up to check to see if we had fishing licenses. I proudly showed him my license and told him that in the years I've been fishing, nobody has ever come by to check on my license... even though I've always had it with me. I was actually glad to see him and I think that really surprised him! And yes, we all had fishing licenses. Be sure to click on each image to see a closer view!
Friday, June 26, 2009
Night Photography
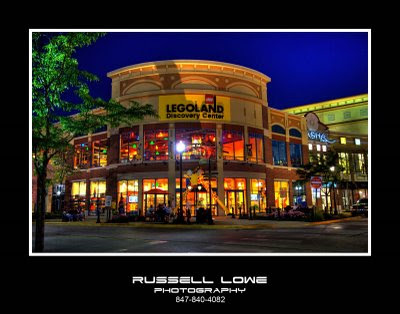
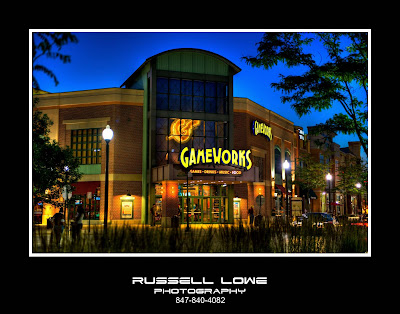
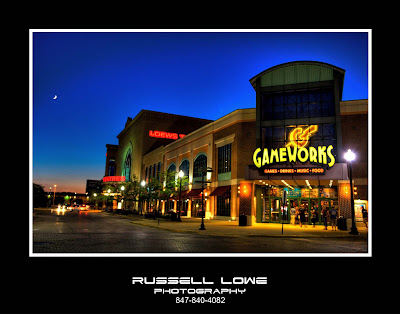
These three images were created this evening while teaching night photography.
With the right exposures and some post production work, these images of Gameworks and Legoland at The Streets of Woodfield prove that sometimes taking a photograph at night could be more interesting than during the day. Be sure to click on each image for a closer look.
Thursday, June 25, 2009
Night Photography Photos - Coming Soon
I'll be teaching night photography later tonight and will post some images by tomorrow. Stay tuned!
Monday, June 22, 2009
Colorful...
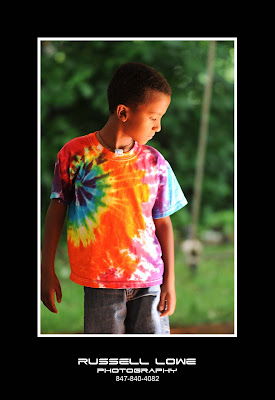
I'm currently working on the images from Saturday's wedding and ran across this image of a boy at the reception. The reception was held outdoors and many of the guests dressed appropriately for the weather, including this boy. We had a lot of rain the day before and so while we ended up with a beautiful day on Saturday, the humidity and heat was definitely something we had to deal with.
I saw the light coming into the tent that the boy was under and saw a great opportunity, so I took the shot. The colors are natural and not "Photoshopped." It's a "cool" shot, don't you think? And while the shot was cool, for me to stay cool, I drank at least 7 full bottles of bottled water Saturday and sweated it all off!
First Presbyterian Church - Arlington Heights, IL
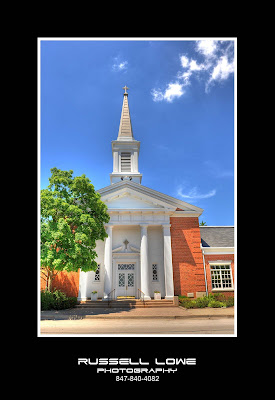
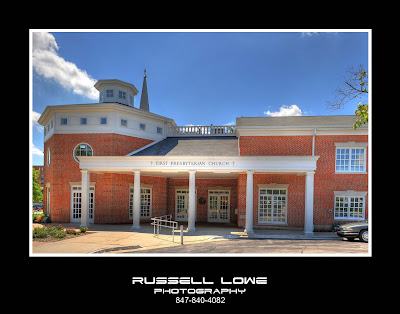
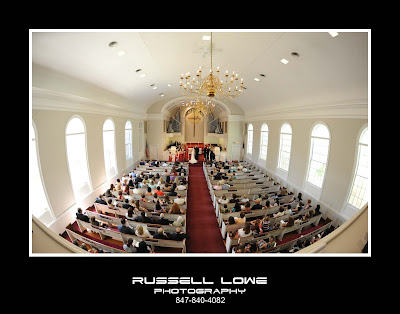
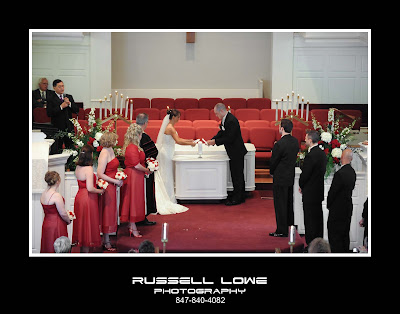
Over the years, I've photographed several weddings at the First Presbyterian Church in Arlington Heights, IL. These images however, were taken this past Saturday. Like at many churches today, I was asked to take photos only from the back of the church which can make it difficult to get good images at a wedding without the help of high quality telephoto lenses and a good camera. Luckily for me, that's not an issue. I photographed these two ceremony images from the balcony of the church. They came out just fine. Be sure to click on each image for a closer look.
Friday, June 19, 2009
Manfrotto 229 - 3 Way Pan / Tilt Tripod Head
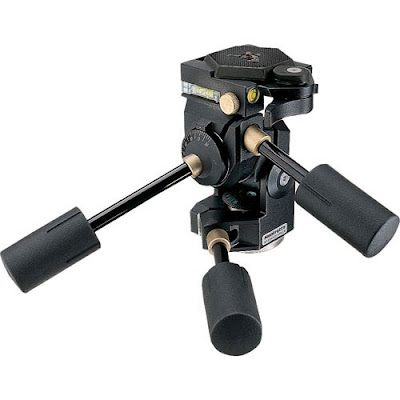
The Manfrotto 229 three-way head is the tripod head that is attached to my trusty Bogen / Manfrotto 3046 tripod. I used this head when making the panorama images seen on my 6-18-09 post. With bubble levels to help guide me, I can be assured that the camera is perfectly level when panning to create the multiple images needed to make a panorama composite image.
Thursday, June 18, 2009
Panorama Images With And Without HDR
(Left to right, Top to bottom)
These images of the atrium at my office were taken while teaching my class on Panoramas. The individual images were stitched together using Photoshop from four images taken with the Nikon D3 camera and a Nikon 24-70mm f2.8 lens on a tripod. For the HDR version, each of the four images had 5 exposures each and were first created with the HDR technique before being stitched together in Photoshop. Essentially, the resulting HDR panorama is a photo using 20 images to make the final image. When all the images were combined, the image measured roughly 37 inches by 7 inches in size! These have been downsized for web use of course.
As a comparison, a Nikon 16mm fisheye lens was used to see how a panorama image stitched together with Photoshop looks against the fisheye. The HDR technique was also utilized. The fisheye doesn't quite cover the full 180 degree view as Nikon claims. It's close, but not exactly 180 degrees. It does show more of the image above and below, but it also makes the distortion of a fisheye lens more noticeable as well. The panoramas do not show the extra top and bottom space, but it does show the full 180 degrees. However, if the fisheye lens version were to have the top and bottom cropped off to similar aspect ratio dimensions as the panoramas, it would look extremely similar to the real panorama images.
Which do you like better? And do you like the HDR version or the standard, "Non-HDR" version better? Be sure to click on each image to get a closer look.
Panorama
I will be teaching Panorama photography today and will post some images later.
We will be taking a series of photos on a tripod and then stitching them together using Photoshop. While it's natural to get some edge to edge distortion using this technique, it's still a very impressive way to create a panorama image. True panorama camera rigs are the best way to create this effect, but unless you shoot panoramas a lot and for a living, it's just too expensive of an option. Besides, this Photoshop method is pretty good and a lot of fun to do.
Check back later for some sample images. I promise you'll be amazed. :)
Sunday, June 14, 2009
Panning
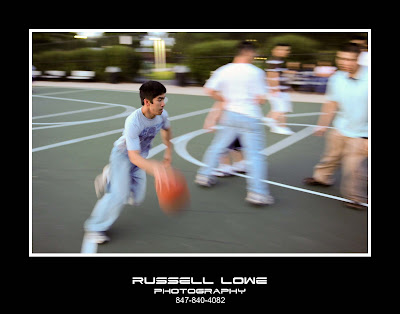
This weekend, I photographed a quick "pick-up" basketball game. It was getting really late in the day and by the time this image was taken, it was already 8:47 PM. With each shot I took, it just kept getting darker and darker as the sun started to disappear.
I kept my Nikon D3 on with continuous exposure using focus tracking and it did a great job even in fairly low light. But since the camera was also set for auto ISO and aperture priority, the shutter speed kept dropping in order to get a decent exposure. By the time this image was taken, I was getting 1/40 second at f2.8 with ISO at 3200. The shot was taken at a focal length of 32mm on the Nikon 24-70mm f2.8 lens.
I kept my camera locked on the player with the ball and followed him as he drove for the shot. Moving the camera to keep up with the subject is known as "panning." Interestingly, only his upper body is focused because everything else in the scene was moving! It makes for a very cool shot, don't you think? The image while blurred, shows action and that's exactly what was going on. Definitely click on the image to see a close up of the image to see the sharpness and blurring.
The D3 was set to shoot at 9 frames per second and with every attempt at a point, I was able to document the game... step by step.
Friday, June 12, 2009
Extreme HDR
Here's an image that one of my students photographed and processed using the HDR technique. The image was created with three exposures and shot in RAW format.
Instead of a standard "photo" effect, he went for the extreme. When HDR images are done like this, a "cartoon-like" effect is usually seen, but it works here. The image was then cropped to achieve a panoramic view as well. Colorful, isn't it?!
Nice job Marc! Be sure to click on the image for a closer look.
Sunday, June 07, 2009
Famous Dave's - Vernon Hills IL
And yet another example of the power of an HDR image...
This one was taken in early June just after 7:00 PM. The first image is the standard JPG and the second image is the "enhanced" HDR image which combines only 3 RAW exposures. Be sure to click on each image for a closer look.
Thursday, June 04, 2009
One More HDR Photo Example
(7 exposures combined)
I thought I'd share one more photo from today's HDR training session.
I shot this image of the front of my office building, but I had forgotten to use RAW when taking the photos, so instead, I shot the images in JPG.
The HDR version was a combination of 7 exposures shot in JPG. While RAW is the preferred method for working an HDR image, apparently, it's not all that bad with JPG either!
The standard JPG shot is the comparison of a non-HDR image. Which do you like better? While you might initially think that the HDR photo is darker, it really isn't. Look closely at the trees and you'll see that it's actually a little brighter than the standard photo. But of course, the sky is darker and richer due to the nature of the HDR process.
Again, be sure to click on each image to take a closer look. These were taken with the Nikon D3 camera on a tripod, instead of handheld. For a description of what HDR is all about, see the other post from today.
Photography Class - HDR Photography (High Dynamic Range)
(7 images combined)
Today, while teaching photography, we studied HDR Photography. HDR stands for "High Dynamic Range." Basically, HDR combines several images together to create a single image that can show very bright areas of a photo along with very dark shadow areas of a photo... all in one image.
As you can see, a standard photograph taken normally and based on the reading of the built-in meter of the camera shows the atrium in my office building with all the windows all "blown out" with the sunlight. But the plants look fine. However, even within the plants, the shadow areas are not bright enough to show details.
Now look at the HDR photo. The windows no longer look over-exposed (you can see outside!) and also the plants have enough light that you can see the details inside the formerly shadowed area. Essentially, the range of dark to bright areas are now rendered such that you can see more details in both very bright areas and very dark areas. No additional lighting was used to create this image... what you see is lighting provided by the sunlight outside and any additional lighting is from the flood lights above. Essentially, the same lighting that was used to create the first image above.
So how can the HDR image show so much more detail? Well, this particular HDR image combined 7 different exposures to make the one. However, you can make HDR images with as little as 3 images combined. While a tripod is often helpful to align all the images, I simply handheld the camera for this exercise. Sitll, the image looks pretty good, don't you think? Be sure to click on each image to take a closer look.
How do you make these incredible HDR images? Well, first you sign up for a class with me... and then we learn about...
You get the idea.
Monday, June 01, 2009
AquaTech Rain Shield - Keeping the water out
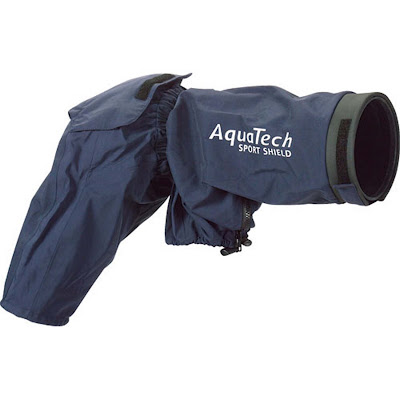
While my trusty Nikon D3 is basically water resistant, I don't trust it being so. As an added measure for success, I have one of these AquaTech Rain Shields in the event I need to shoot in the rain.
The AquaTech is one of the best rain covers around, but I have no idea if it works or not. I've never had to use it! It's not often a bride is going to want to continue the wedding with downpouring rain happening, but I'm prepared if it does.
The only thing these rain shields do not do is cover the actual lens of the camera. So if water gets on the lens, you'll have "spotty" photos anyway. But at least my camera won't be damaged. The lens' own sunshade extends out beyond the AquaTech and that is supposed to help keep the lens from getting wet. But the moment you tilt the lens towards the sky, all is lost.
You'll see sports photographers shooting with the AquaTech all the time. Regardless of a slight drizzle, the game usually continues. Check out football and baseball games on TV. You'll see the AquaTech in use then...
Subscribe to:
Comments (Atom)


